CLEANING THE MAIN CHARGER OF THE PHOTOCONDUCTIVE DRUM
Overview
If black lines or colored lines appear even after you have cleaned the document glass and automatic document feeder, use the charger cleaner to clean the main charger that charges the photoconductive drum.

- If cleaning the main charger of the photoconductive drum does not solve the problem, pull the knob out and push it back three more times.
- When pulling and pushing the knob to clean the charger, pull and push the knob slowly from one end to the other.
Operation
 Open the front cover.
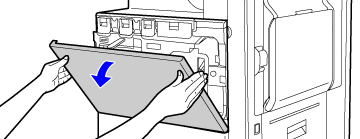
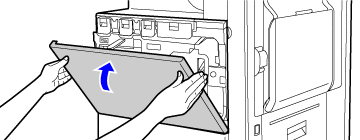
 Release the toner collection container.
Press the toner collection container release button.
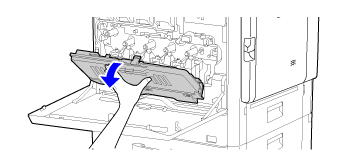
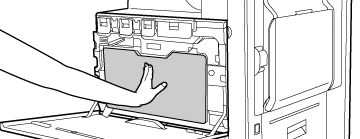
The toner collection container will fall forward as shown.
Gently support the container with your hands as you let it fall forward as far as it will go.
The toner collection container will fall forward as shown.
Gently support the container with your hands as you let it fall forward as far as it will go.
 Grasp the green knob to release the lock and gently remove the charger cleaner.
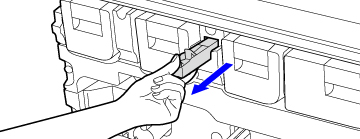
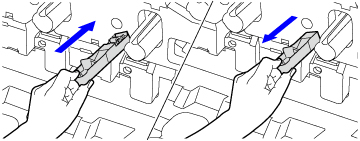
 Clean the main charger.
 Gently push the charger cleaner all the way in, and gently pull it out.
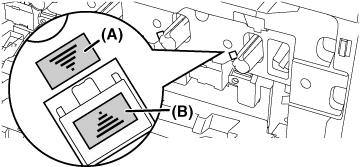
Insert it so that label (A) on the cleaning target side and label (B) on the charger cleaner side are oriented as shown.
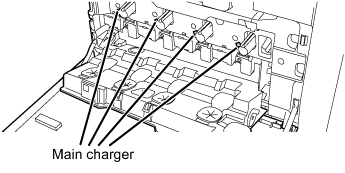
 Repeat step 4 with all other main chargers.
 There are a total of 4 places to be cleaned in the machine as shown.
 Replace the charger cleaner in its original position.
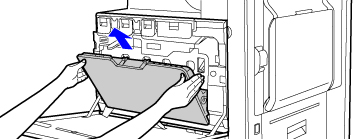
 Push the toner collection container into the machine.
 Push the container in until it clicks into place.
 Close the front cover.